There’s something truly comforting about waking up to the smell of freshly made buttermilk waffles wafting through the kitchen. It’s like being wrapped in a warm hug, inviting you to kick back and enjoy the simple pleasures of a home-cooked breakfast. One sunny morning, while rummaging through my pantry, I came across a carton of buttermilk sitting there, patiently waiting to be transformed into something delightful.
This recipe is my secret weapon for those weekends when I want to impress family or friends without spending hours in the kitchen. These waffles are incredibly easy to make, fluffy on the inside, and perfectly crisp on the outside, striking that ideal balance between indulgence and comfort. Whether topped with fresh fruit, a drizzle of maple syrup, or a dusting of powdered sugar, they are sure to be a crowd-pleaser.
Join me as I share this fabulous buttermilk waffle recipe that will not only brighten your mornings but also banish the boring breakfast routine that fast food has so often lured you into. Let’s whip up something special!
Why Will You Love Buttermilk Waffles?
Fluffy texture: These waffles are delightfully light and airy, creating a melt-in-your-mouth experience.
Quick prep: With just 10 minutes of prep time, you can have breakfast ready in a snap.
Versatile toppings: Customize with your favorite fruits, syrups, or whipped cream for endless flavor combinations.
Family favorite: Their irresistible taste and texture make them a hit for both kids and adults alike.
Homemade goodness: Say goodbye to bland fast food; enjoy the comfort of freshly cooked waffles right at home!
Buttermilk Waffle Ingredients
For the Batter
• All-purpose flour – This forms the base of your waffles for that perfect structure.
• Sugar – A touch of sweetness to enhance the flavors of your buttermilk waffles.
• Baking powder – This leavening agent ensures your waffles rise beautifully.
• Baking soda – Works in harmony with the buttermilk for a light and fluffy texture.
• Salt – Balances the sweetness and enhances overall flavor.
• Buttermilk – The star ingredient that adds richness and tang, making these waffles utterly delicious.
• Butter – Melting butter gives the waffles a golden color and rich flavor.
• Eggs – Helps bind the ingredients together, contributing to the fluffiness of your waffles.
• Vanilla extract – A splash of vanilla adds an aromatic sweetness that elevates the dish.
These buttermilk waffle ingredients combine to create a breakfast that will have everyone coming back for seconds!
How to Make Buttermilk Waffles
-
Whisk Dry Ingredients: In a medium bowl, combine the all-purpose flour, sugar, baking powder, baking soda, and salt. Whisk together until they are well blended, creating a fluffy foundation for your waffles.
-
Mix Wet Ingredients: In another medium bowl, whisk the warm buttermilk and melted butter together. Add the eggs and stir until everything is thoroughly combined, creating a rich mixture that will add moisture to your waffles.
-
Combine Mixtures: Pour the dry ingredients into the wet ingredients and gently whisk until just combined. It’s okay if there are still a few lumps; this will ensure your waffles remain light and airy. Fold in vanilla for that delightful aromatic touch.
-
Rest the Batter: Allow the batter to rest for about 10 minutes. This step is crucial for letting the gluten relax, which helps create a tender waffle that’s crispy on the outside and fluffy on the inside.
-
Preheat Waffle Iron: While the batter rests, preheat your waffle iron according to the manufacturer’s instructions. Lightly grease it with cooking spray or a bit of melted butter for easy release.
-
Cook the Waffles: Pour about ⅓ to ½ cup of batter into the preheated waffle iron, spreading it evenly until it almost reaches the edges. Cook until the waffles are golden brown and crisp, then carefully remove and enjoy with your favorite toppings!
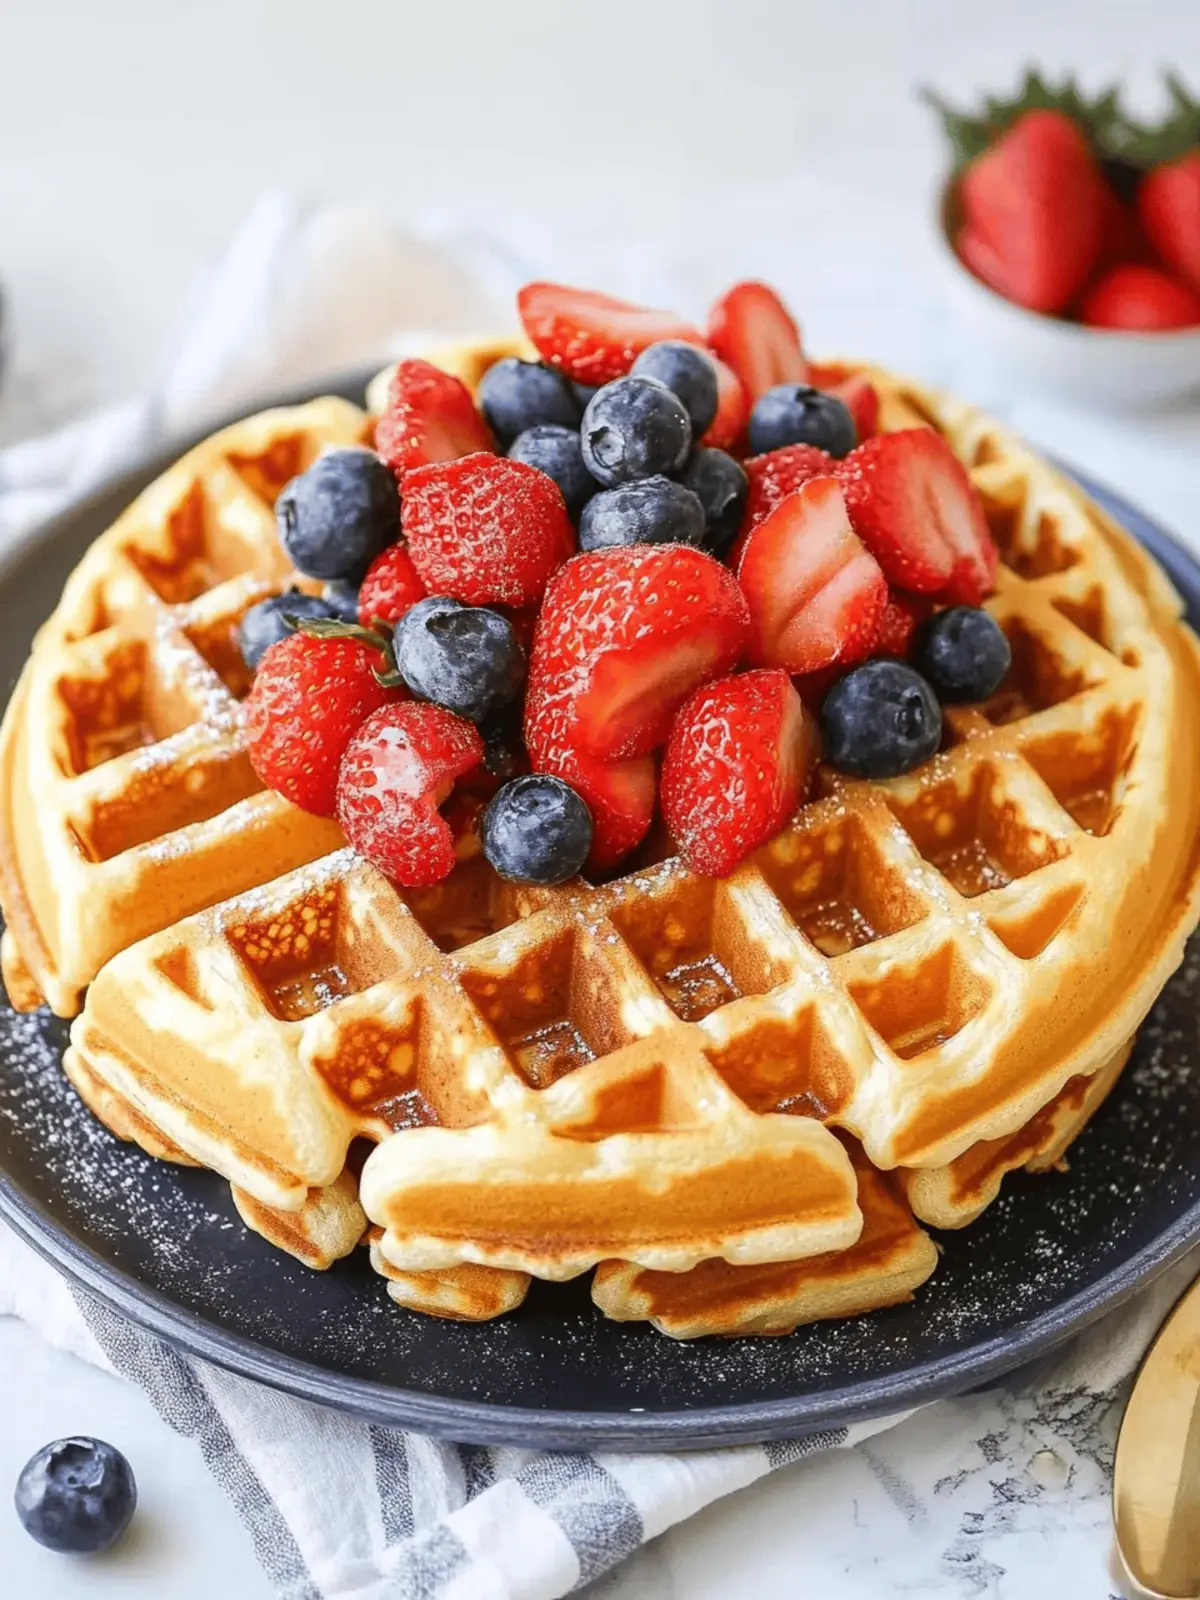
Optional: Drizzle with homemade syrup or top with fresh berries for a burst of flavor.
Exact quantities are listed in the recipe card below.
Make Ahead Options
These Buttermilk Waffles are perfect for busy mornings, as you can prep much of the work in advance! You can make the batter up to 24 hours ahead; simply prepare it as usual, cover it tightly with plastic wrap, and refrigerate. This helps the flavors meld beautifully, ensuring your waffles are just as delicious when cooked. If you’re looking to save even more time, you can cook the waffles, let them cool, and then freeze them for up to 3 months. To reheat, simply toast them or warm them in the oven for crispy results. Enjoy the convenience of having a delightful homemade breakfast ready at your fingertips!
Helpful Tricks for Buttermilk Waffles
-
Use Warm Buttermilk: Warm buttermilk helps activate the baking soda, ensuring your buttermilk waffles rise properly for that fluffy texture.
-
Don’t Overmix: When combining the wet and dry ingredients, stop mixing as soon as it’s combined. Overmixing can lead to dense waffles, so embrace a few lumps!
-
Let it Rest: Allowing the batter to rest for 10 minutes is key to creating tender buttermilk waffles with a crispy exterior.
-
Preheat the Iron: Make sure your waffle iron is fully preheated before adding the batter. This helps in achieving that perfect golden crisp on the outside.
-
Experiment with Toppings: Feel free to get creative with your toppings! Fresh fruits, whipped cream, or even a sprinkle of nuts can elevate your buttermilk waffles to the next level.
-
Store for Later: If you make a big batch, freeze the extra waffles. Reheat them in the toaster for a quick breakfast on busy mornings!
What to Serve with Buttermilk Waffles?
Imagine delighting in a heavenly breakfast that feels like a special occasion every day.
-
Fresh Berries: Juicy strawberries, blueberries, or raspberries add a burst of freshness and vibrant color, perfectly balancing the waffles’ sweetness.
-
Maple Syrup: The classic choice! Its rich, caramel-like flavor drizzling down over the warm waffles enhances every delightful bite.
-
Whipped Cream: Adding a dollop of light, airy whipped cream takes the waffles to a decadent level, making them feel indulgent and special.
-
Crispy Bacon: The savory crunch of bacon contrasts beautifully with the fluffy sweetness of the waffles. It creates a fabulous sweet and salty pairing that everyone loves.
-
Sliced Bananas: Their natural sweetness and creamy texture complement the waffles perfectly, offering a simple yet satisfying addition.
-
Yogurt Parfait: A dollop of creamy yogurt layered with fruits provides a tangy contrast to the waffles, adding a refreshing twist to your breakfast spread.
-
Chopped Nuts: Sprinkle toasted pecans or walnuts on top for an added crunch and nutty flavor, making each waffle bite even more enjoyable.
-
Iced Coffee: Sip on a chilled coffee beverage for a refreshing start to your day. Its bold flavors beautifully offset the sweetness of the buttermilk waffles.
-
Chocolate Chips: Fold in chocolate chips to the batter before cooking or serve on top for a delightful treat that both kids and adults will adore.
How to Store and Freeze Buttermilk Waffles
Room Temperature: Enjoy your freshly made buttermilk waffles right away for the best taste, but they can be kept at room temperature for up to 2 hours.
Fridge: If you have leftovers, store them in an airtight container in the fridge for up to 3 days. Place parchment paper between layers to avoid sticking.
Freezer: For longer storage, freeze your cooked waffles in a single layer on a baking sheet before transferring them to a freezer bag. They can be stored for up to 3 months.
Reheating: To reheat, simply pop frozen buttermilk waffles directly into the toaster until crispy, or warm them in the oven at 350°F (175°C) for about 10-15 minutes.
Buttermilk Waffles Variations & Substitutions
Feel free to get creative and make these waffles your own with these tasty ideas!
- Whole Wheat: Substitute half of the all-purpose flour with whole wheat flour for a heartier, nuttier flavor.
- Oat Milk: Use oat milk in place of buttermilk for a dairy-free version without sacrificing creaminess.
- Add Cocoa: Stir in 2 tablespoons of cocoa powder for a deliciously chocolatey twist that kids will adore.
- Spiced Up: Add a pinch of cinnamon or nutmeg to the dry ingredients for a warm spice flavor that dances on your palate.
- Fruit Infusion: Fold in fresh blueberries or chopped bananas into the batter for a fun burst of fruity goodness in every bite.
- Cheesy Delight: Incorporate shredded cheese for a savory variation, pairing wonderfully with a dollop of sour cream or avocado.
- Chili Kick: Mix in diced jalapeños or chipotle powder for a spicy kick that adds a playful flavor adventure.
- Nutty Texture: Add chopped nuts like walnuts or pecans for an excellent crunch and a great source of healthy fats.
Each variation is an invitation to explore and find your family’s new favorite!
Buttermilk Waffles Recipe FAQs
What type of buttermilk should I use for buttermilk waffles?
Absolutely! You should use regular buttermilk, which you can find in any grocery store. It’s crucial for achieving that characteristic tang and contributes to the wonderful lift you’ll get in your waffles. If you’re in a pinch, you can create a substitute by mixing 1 cup of milk with 1 tablespoon of lemon juice or white vinegar, letting it sit for about 5 minutes!
How do I store leftover buttermilk waffles?
Very simply! For the best flavor and texture, place your leftover buttermilk waffles in an airtight container and refrigerate them for up to 3 days. I recommend putting a piece of parchment paper between each waffle to prevent them from sticking together. When you’re ready to enjoy them again, just pop them in the toaster for a warm, crispy treat!
Can I freeze buttermilk waffles?
Yes! Freezing buttermilk waffles is a fantastic idea! Just wait until they’ve cooled completely, then lay them out in a single layer on a baking sheet. Once frozen, transfer them to a freezer bag for easy access. They’ll stay fresh for up to 3 months. To reheat, pop them in the toaster directly from the freezer for a quick breakfast on the go!
What can I do if my batter is too thick?
Don’t worry, it happens! If your waffle batter seems too thick, just add a little bit more buttermilk, one tablespoon at a time, until you reach the desired consistency. The batter should be pourable but not runny. Remember, a thicker batter will yield heartier, more dense waffles, which some people prefer!
Are buttermilk waffles safe for my pets?
While buttermilk itself is generally safe for dogs in moderation, it’s best to avoid giving your pets any human food that contains added sugar or other toppings like syrup or berries. Always consult your veterinarian for dietary advice tailored to your pet’s specific needs!
Can I make buttermilk waffles without eggs?
Certainly! You can replace each egg with 1/4 cup of unsweetened applesauce or a mashed banana for a vegan-friendly option. This will still yield delightful fluffy waffles while avoiding eggs altogether. Just keep in mind that different substitutes can slightly alter the texture and flavor, but they’ll still be delicious!
Fluffy Buttermilk Waffles That Beat Any Restaurant!
Ingredients
Equipment
Method
- In a medium bowl, combine the all-purpose flour, sugar, baking powder, baking soda, and salt. Whisk together until well blended.
- In another medium bowl, whisk the warm buttermilk and melted butter together. Add the eggs and stir until thoroughly combined.
- Pour the dry ingredients into the wet ingredients and gently whisk until just combined, folding in the vanilla.
- Allow the batter to rest for about 10 minutes.
- Preheat your waffle iron according to the manufacturer's instructions. Grease it lightly.
- Pour about ⅓ to ½ cup of batter into the preheated waffle iron and cook until golden brown and crisp.


